Astera AI Agent Builder - First Look Coming Soon!
The Automated, No-Code Data Stack
Learn how Astera Data Stack can simplify and streamline your enterprise’s data management.

Top EDIConnect Features: EDI Transaction Process
Many businesses use Electronic Data Interchange (EDI) to send and receive messages. Last week we covered EDI source files and parsing. This week, we reach our number one feature for Centerprise’s EDIConnect connector: the EDIConnect Transaction Process.
- EDI Builder and Destination File
To build an EDI document, use the EDI Builder feature. There are two steps in this process. First, build the EDI message using EDIConnect Visual Designer. Next, validate it against Partner Standards and send it out.
EDI Builder
Select File > New > Dataflow.
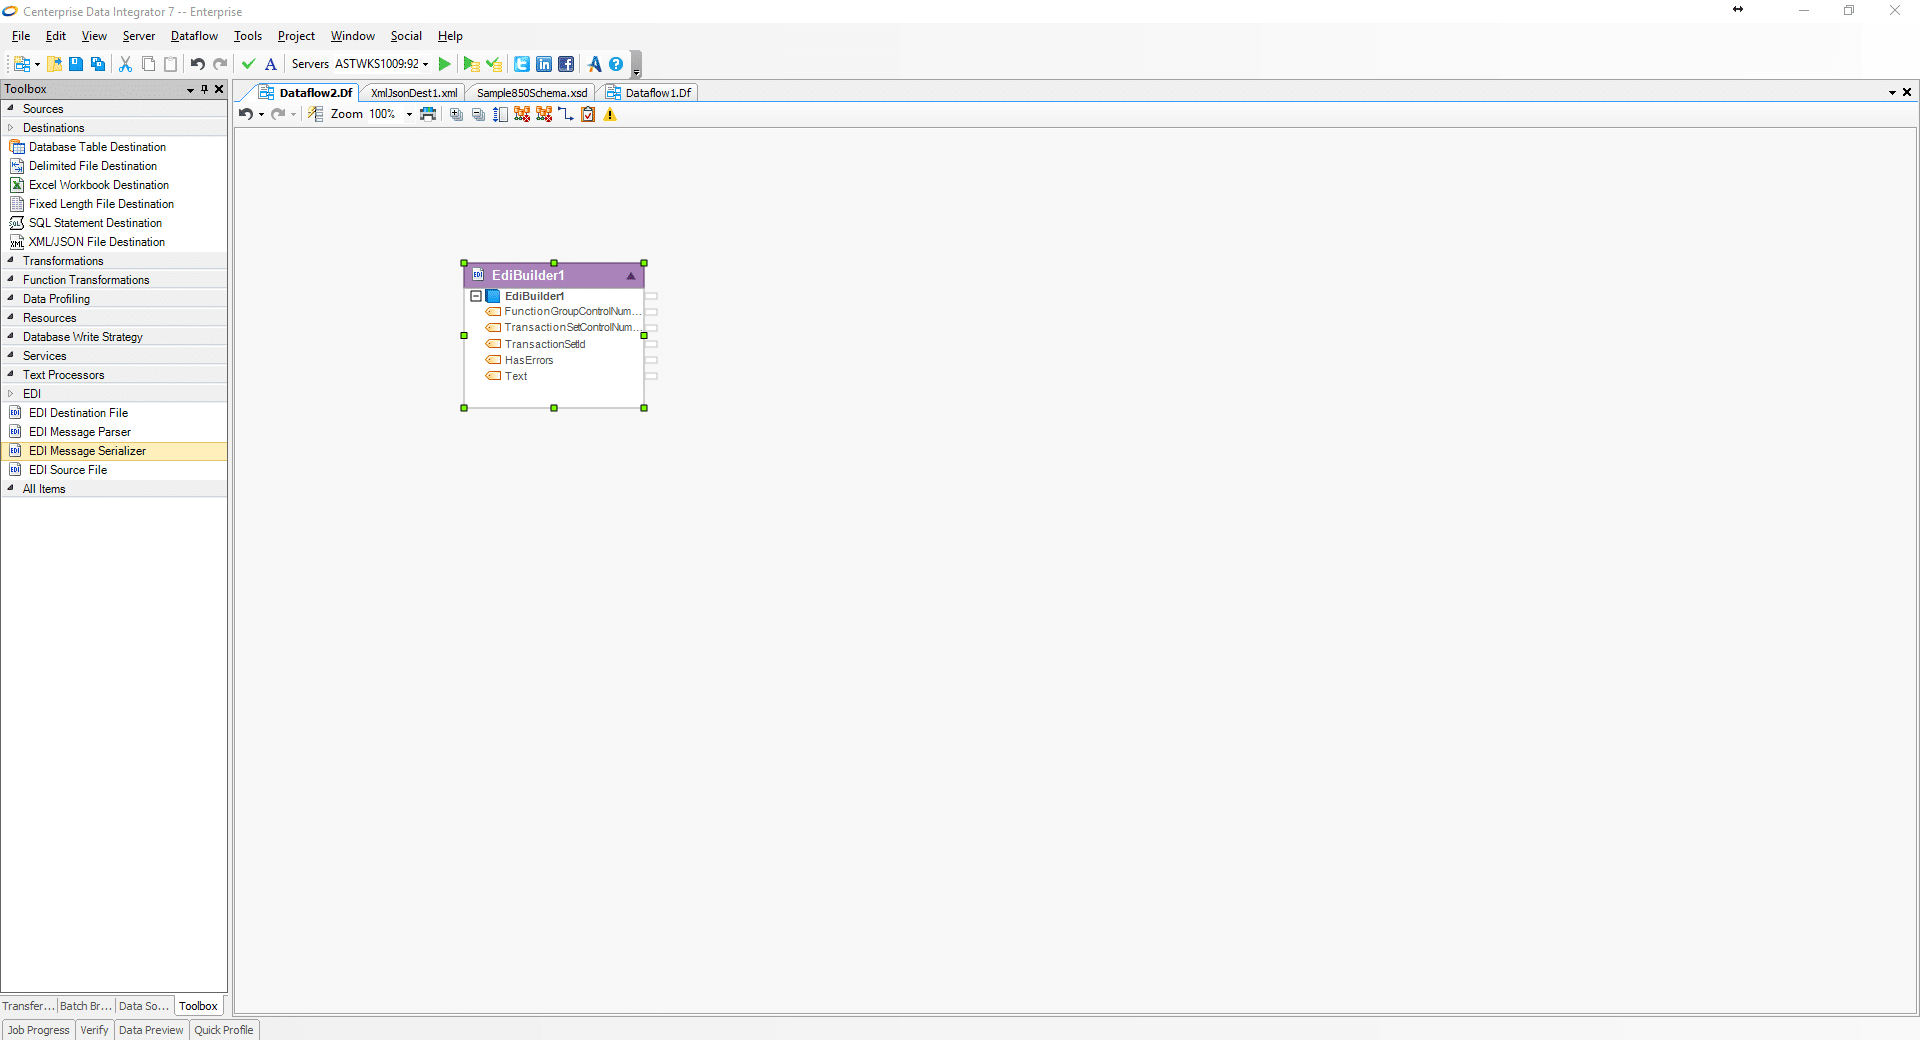
To create an EDI file, select the EDI Message Serializer from the Toolbox on the left as shown in the screenshot below. Drag and drop the EDI Message Serializer to the Dataflow.
Setting EDI Builder Properties
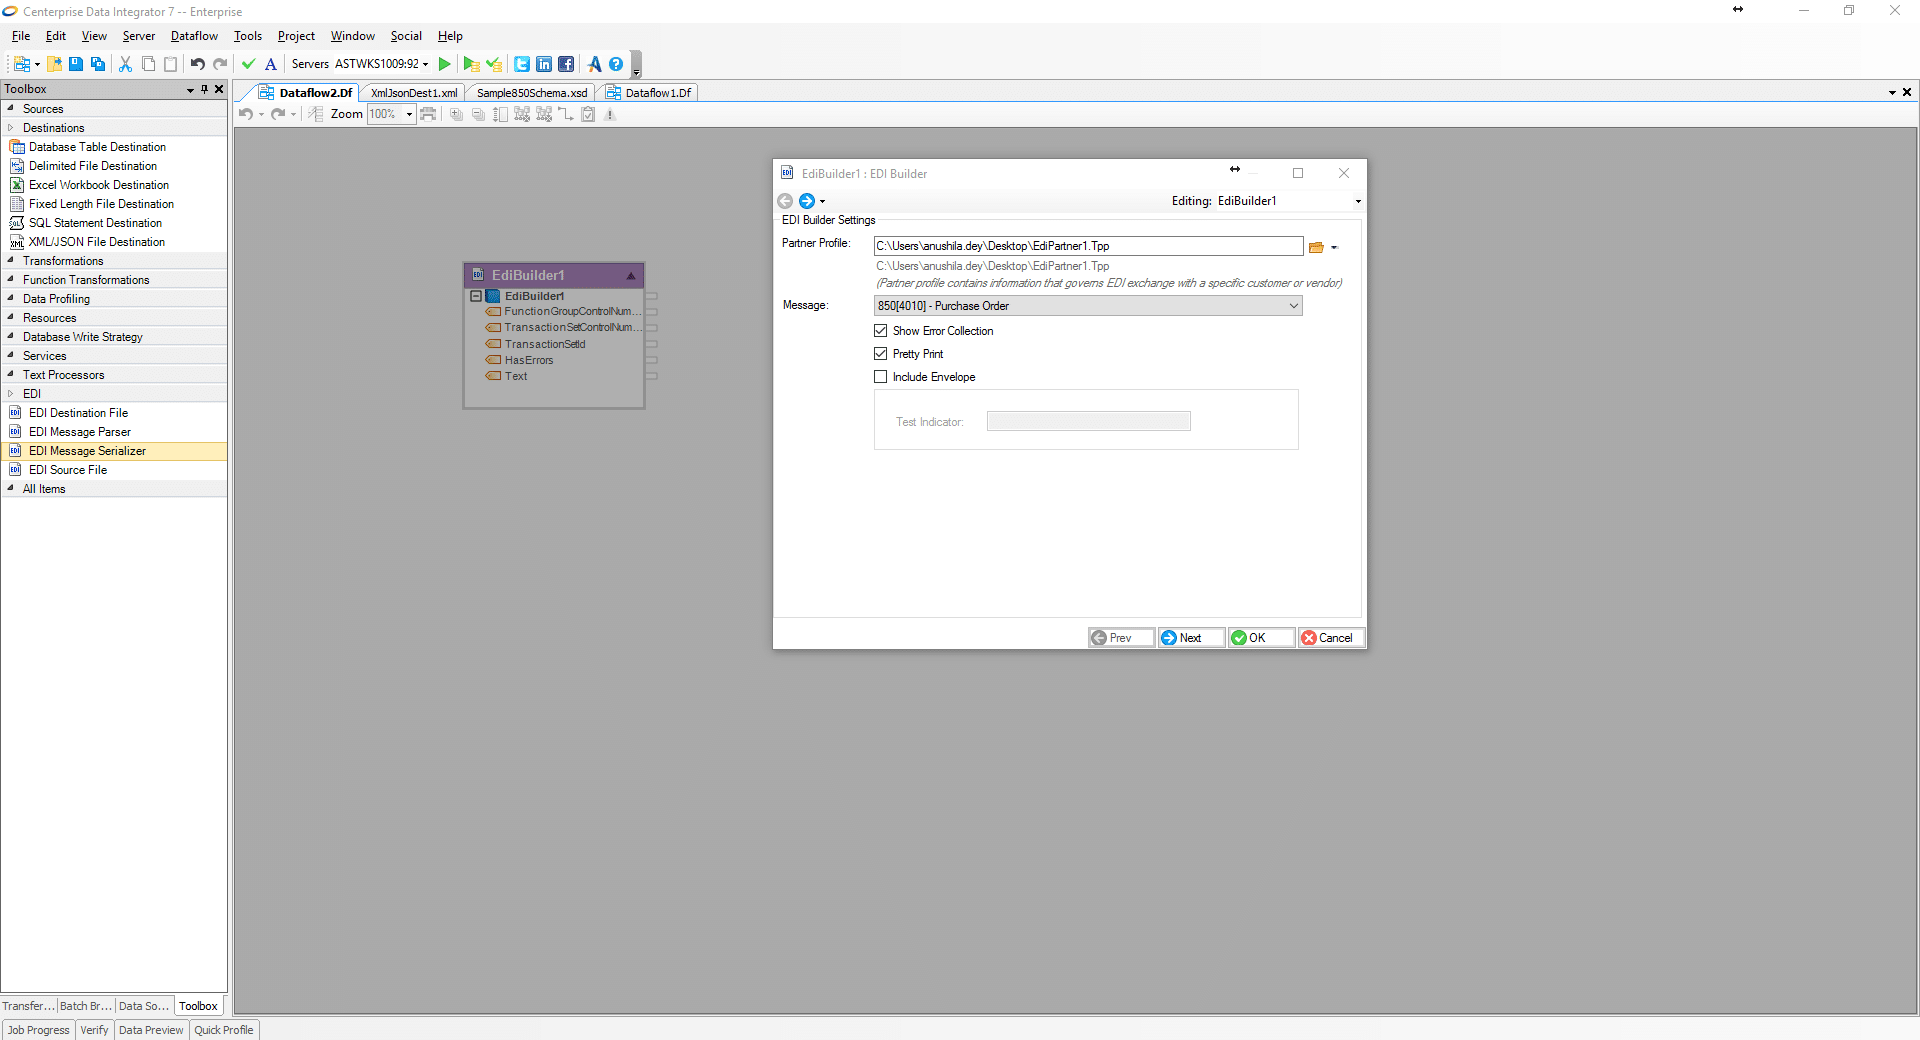
Right-click on the EDIBuilder message and select Properties. A dialog box opens as seen below. First, point this file to a Trade Partner Profile: this automatically selects the transaction type for the outgoing EDI message.
EDI Builder Structure
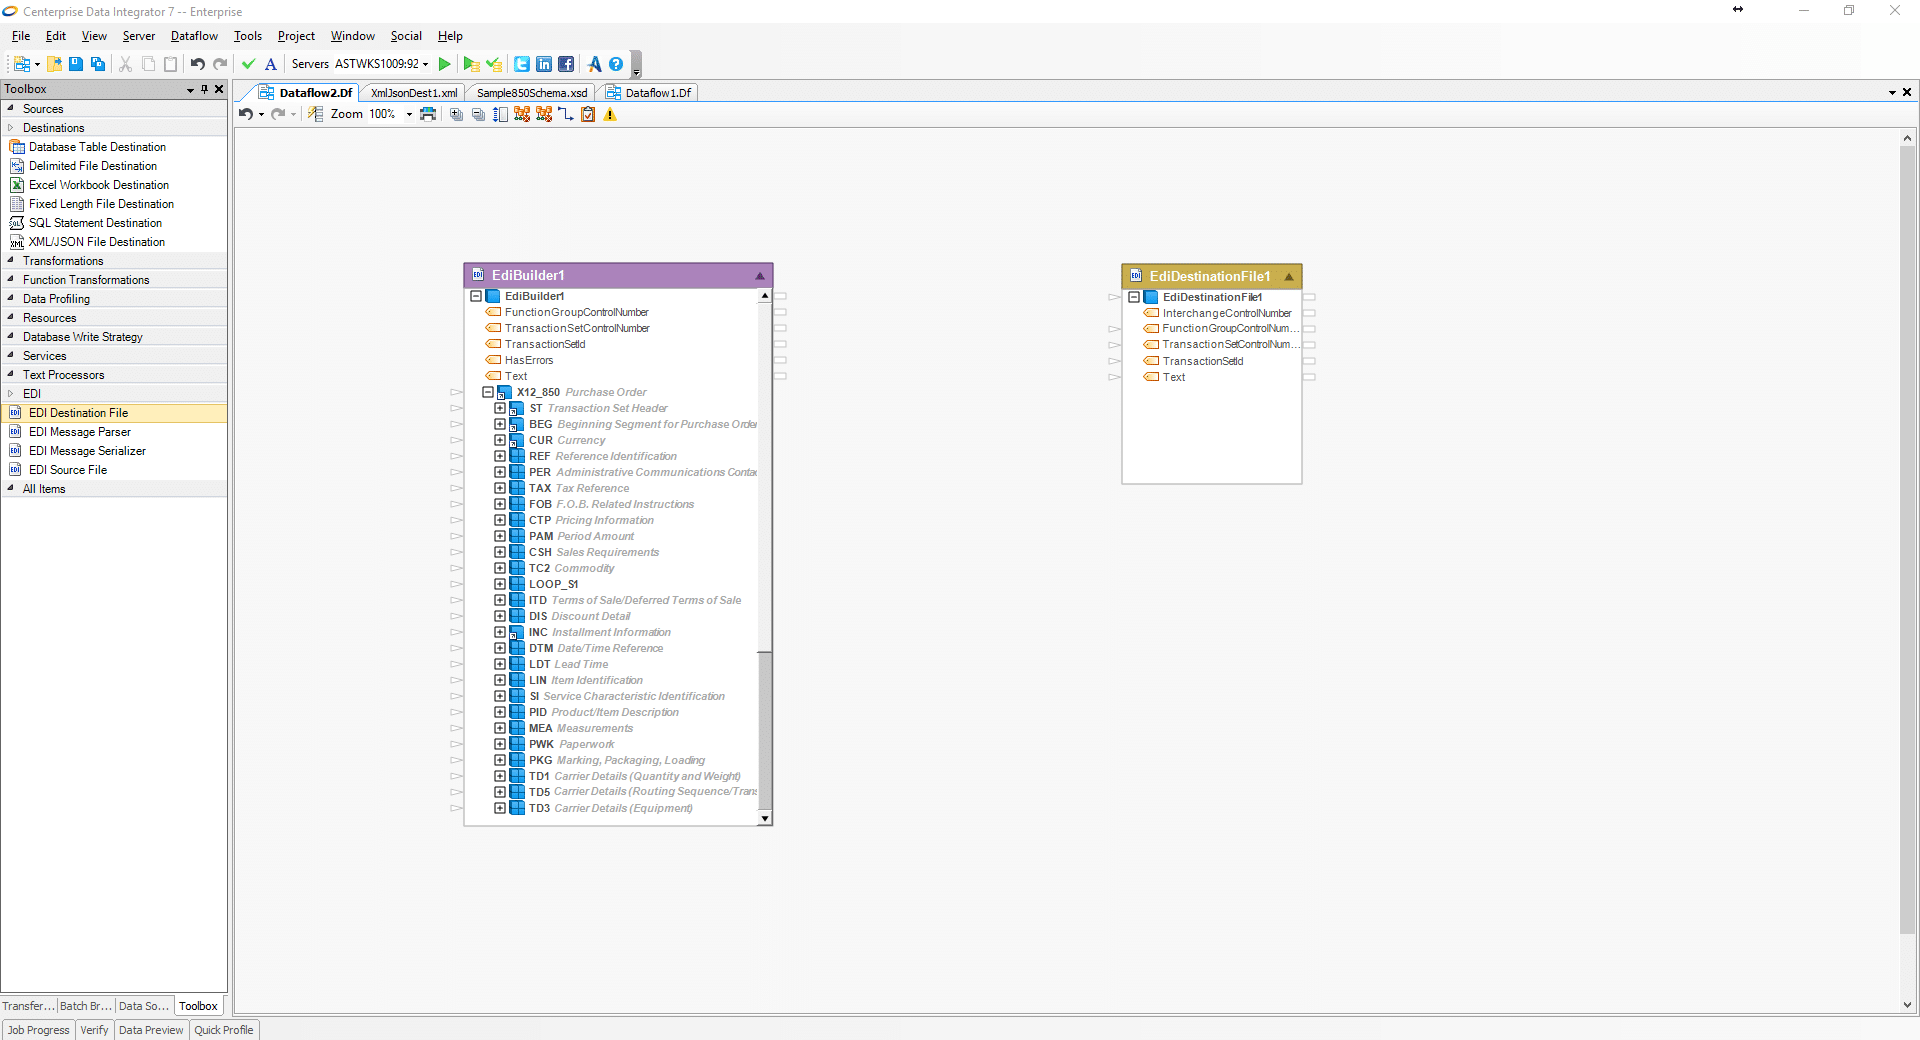
The EDI builder now has a structure for the selected transaction type in the previous step. Any problems and errors that occur during a preview are shown in the Errors section.
EDI Destination File
EDI destination files can also be selected from the toolbox and dragged and dropped into the Dataflow. Use the file properties to specify the location of the output file and the Trade Partner Profile data.
Finally, map the EDI Builder file to the EDI Destination file as seen in the screenshot below. This Destination file will contain the final EDI message.
EDIConnect can be used to handle entire EDI transaction process. It supports all EDI message standards and customizes transaction documents: EDI transactions have never been easier.
That concludes our top 4 EDIConnect features! We hope that you’ve enjoyed this series and that you’ll check back next week for more exciting new information.
Authors:
Irfan Ahmed